We’ve been hard at work on Iris for a while now. As development of 1.0 nears the end we’ve started working on demo videos and marketing materials as well. Here is a quick demo of Iris.
The Iris beta has been in full swing for about 2.5 months now. The core of the program has firmed up a lot, stability and performance are up, and many enhancements have been implemented to make Iris not only powerful, but a joy to use.
Changes since last progress update.
Recordings to native Iris format now use delta frames to save on disk space
Encoding and decoding native format are now massively parallel to take advantage of more CPU cores
Decoding native format is now 25% faster
Cursor can now be enabled/disabled during recording
Mute button can now optionally function like a cough button
Talking head now has additional appearance options: border thickness, border color, corner radius
Can now record and export to h.264, Apple ProRes and JPEG
Audio can now be recorded as mixed, discrete channels, or separate tracks
Added window and freeform selection
Added settings presets
Other bug fixes and improvements
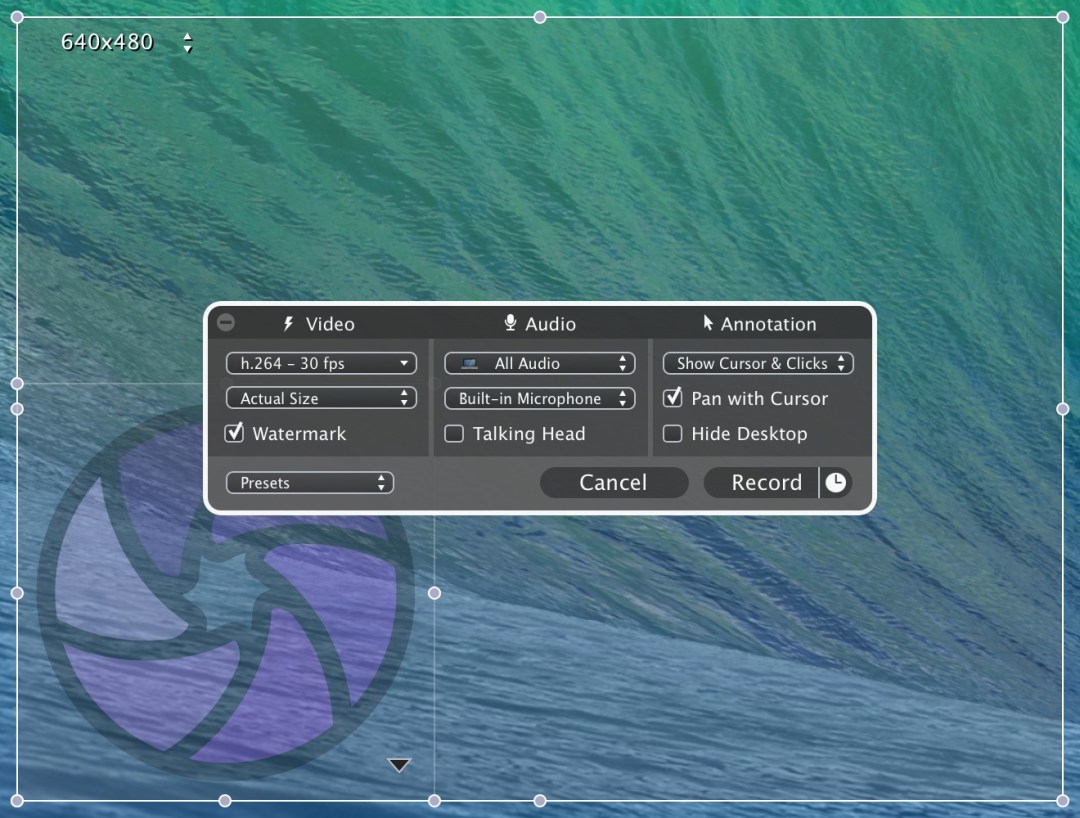
Notably, the Iris recording UI was overhauled. It looks nicer and the item grouping makes more sense.
We’re looking forward to releasing Iris. There a few things to wrap up before we can ship it.
Many screen recorders have come and gone over the years and there has been one thing that has united them all.
Poor color matching.
Iris is here to end this sad state of affairs. Iris’ video processing pipeline ensures a high degree of color fidelity from end to end resulting in recordings that are as faithful as possible to the original material.
Color Matching Done Right
Color Bar
Iris Recording
Go ahead. Launch DigitalColor Meter and compare the color values for the color bar on the left and the recording of it on the right. Note: color samples vary from screen to screen.
The Result
Shown here is the *worst* color match we were able to find in this sample.
Color Bar Sample
Iris Recording Sample
Everybody Else
Below you’ll find color samples taken from 2 popular screen recorders on the market. Note the extra green and lack of red in both of them.
Competitor 1 Sample
Competitor 2 Sample
Beta
We are striving to make Iris the best screen recorder possible. Iris is currently in beta at MacDeveloper.net Please sign up if you want early access to Iris and a chance to give us feedback.
Throughout development we are continuing to refine both the feature set and the UI of Iris. We already had the ability to stop a recording on a timer, but for some reason overlooked being able to start recording on a timer.
This gave us a chance to reevaluate the UI layout. We moved all of the timed recording UI, both starting and stopping, into a separate area. This way the UI stays out of the way until it is needed.
To access timed recording just click on the clock in the record button, set the times or durations, and click record.
We also added a way for users to type in the capture size and location. This is great when you know exactly how big of an area that you want to capture.
We just sent out the 4th beta to testers. If you are interested in beta testing Iris please sign up at MacDeveloper.net.
2 updates ago we discussed Iris’ Automatic Naming. I thought I was done with Saving preferences when I suddenly realized that I had overlooked something. It was staring me right in the eyes. Finder Tags!
So, without further ado Finder Tags in Iris.
Just type in the Finder Tags that you want attached to your recordings and that’s it. Now you have a great way to find your recordings in the Finder.
If you have any ideas on how to make Iris’ naming and tagging better contact us or sign up for the Iris beta ad MacDeveloper.net.
You may not be aware, but there is a new Time Lord coming and it’s not the one you are probably thinking of. The new Time Lord that I’m talking about is Iris.
Marcus, the artist working on Iris, had a special request for Iris. Artists are a temperamental bunch, so usually it’s better to just give them what they want. In this case, Marcus wanted to make time lapse recordings of his work to post as demos. So, we set out to add this feature to Iris. I’m pretty happy with how it turned out.
You can specify to capture at a certain frame rate or you can specify the amount of time between frames. Then it’s as simple as specifying how much you would like to speed up or slow down the video. In this example we’ll get a 30fps movie that is playing back 3 times faster than usual. Check out the videos below to see a demo of speeding up the captured movie.
I hope users find this feature useful. I know Marcus will. If you have a moment you should check out the inspiration for this feature at his website, digitalmanipulation.com. I’m sure he’ll be posting some recordings of how his creations are made soon.
15 fps capture, No speed up
(c) copyright 2008, Blender Foundation / www.bigbuckbunny.org
5 fps capture, 3x speed up (15 fps movie)
(c) copyright 2008, Blender Foundation / www.bigbuckbunny.org
Throughout the development of Iris we’ve spent a lot of time thinking about how Iris will fit into your workflow. One area that doesn’t seem that important, but profoundly affects the way Iris integrates with the rest of your system is file naming.
Some screen recorders give you a few choices of how to name files. This just isn’t good enough for Iris. We want to let you name your recordings any way you want, but it also has to be easy to use. Starting from scratch we’ve come up with token variable based file naming that I think users will really love.
Take a look below for a preview. This UI isn’t final, but it gives you a good idea of what we’re doing
If you can think of some variables that should be added to the list let us know. Automatic naming will make its debut in our next beta which will be sent to testers in the next few days. If you would like a chance to try Iris out early, please join the Iris beta at MacDeveloper.net.